Enhancing Unity Editor Auto-Completion in Visual Studio

Hello 👋🏻 , I am a curiosity-driven software engineer who likes to write. I have a passion for discovering and working with cutting-edge technology.
Introduction:
Unity developers often rely on a smooth workflow between the Unity Editor and their preferred external script editor, such as Visual Studio. One common issue faced is the lack of auto-completion suggestions when editing scripts within the Unity Editor. In this blog post, we will explore a simple yet effective solution to enable auto-completion seamlessly.
Step 1: Navigate to Preferences
To begin, open your Unity Editor and head to the "Edit" menu. From there, choose "Preferences."

Step 2: Access External Script Editor Preferences
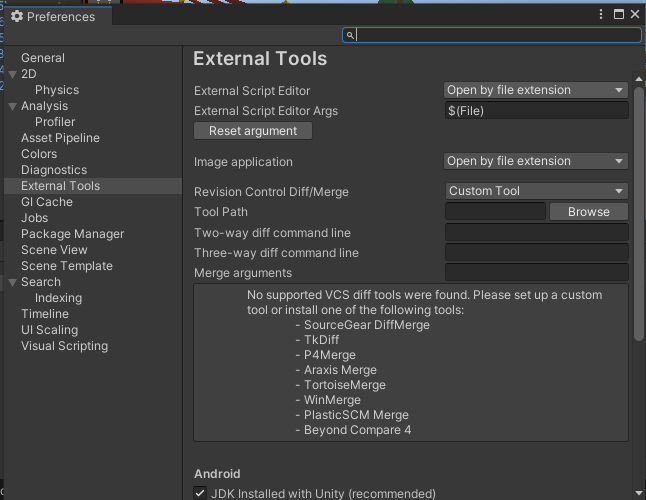
Within the Preferences window, locate and click on "External Tools" on the left sidebar. This will reveal various external tool configurations.
Step 3: Choose Visual Studio
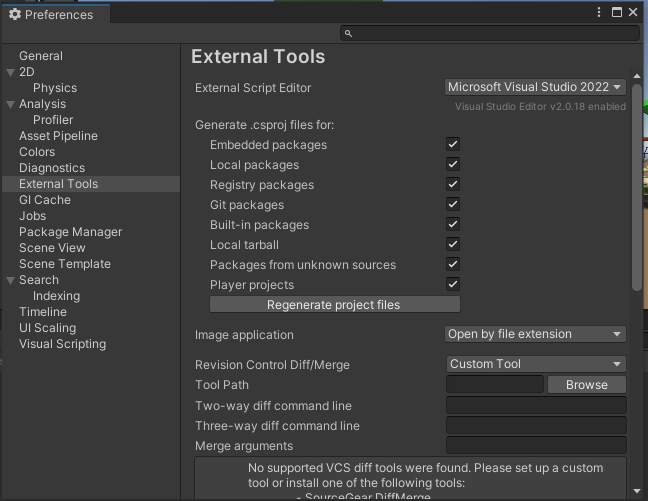
In the External Tools section, find the "External Script Editor" drop-down menu. Select "Visual Studio" from the available options.

Step 4: Configure Visual Studio Preferences
After choosing Visual Studio, you will notice a series of checkboxes. Ensure that all these boxes are checked (This is very important step). These checkboxes include options like "Error in Progress," "Log in Progress," and "Pause in Progress." Checking these boxes ensures that your Unity Editor integrates seamlessly with Visual Studio.
Conclusion:
By following these simple steps, you can significantly enhance your Unity scripting experience in Visual Studio. The auto-completion feature will be readily available, providing you with a more efficient and productive workflow. Enjoy coding in Unity with improved editor integration!
Happy Coding :)


